A user group can contain multiple users, and a user may be member of multiple user groups simultaneously.
Establish a user group
-
Click Add user group in the ribbon
 . The input dialog for the user group will open.
 -
Enter a name for the user group.
-
Assign the rights for the user group.
The following rules apply to the assignment of user rights:
-
A permission granted to a group cannot be removed from the members of that group.
-
A user can be granted permissions that are not available to the group.
-
If a user belongs to multiple user groups, the rights of the user group with the most granted permissions will apply to the user.
Add a user to a group
-
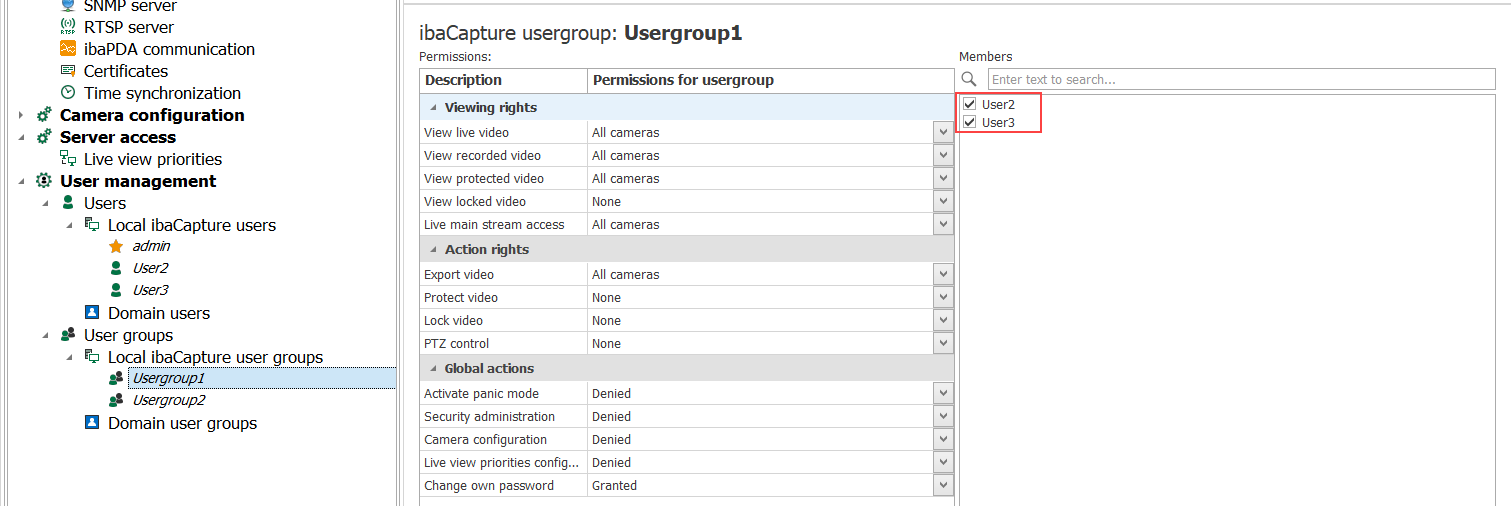
Select the user group. All configured users will be displayed in the member list.
-
Members of a user group are marked with a checkmark. A user's membership in a user group can be changed at any time by checking or unchecking the box.

Changes to the configuration must be confirmed by clicking <Apply User Management>.
Remove a user group
-
Select the user group in the configuration tree and go to the Local menu on the ribbon.
-
Click Remove user group
 .
.
Remove membership of a user from a user group
When a user is selected, all user groups are displayed in the list on the right. A checkmark in the selection box indicates which user groups the user belongs to.

-
Select the relevant user in the configuration tree.
-
The user groups of which the user is a member are marked with a check mark. Membership in a user group can be changed at any time by checking or unchecking the box.
Changes to the configuration must be confirmed by clicking <Apply User Management>.