Before you can exchange data with a database, you must first configure a connection.
-
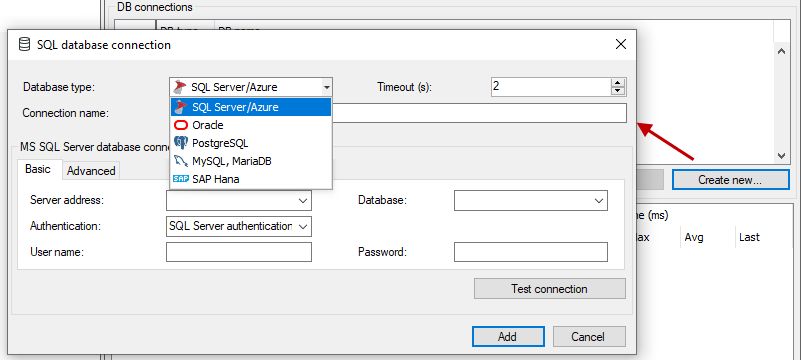
Select the interface SQL Database in the interface tree and click on the button <Create new>.
-
Select the desired database system.
The lower part of the dialog changes depending on which system type you select.
-
In the lower part of the dialog, enter the information about the database or select it (e.g. DB server, database name, authentication method, possibly user name and password).

You can find more details in the next chapter.
By specifying this information, a name is automatically generated for this connection and displayed in the field Connection name (user name@database). You can overwrite the name.
In the case of multiple connections to the same system type, you can distinguish the connection using this name. In addition, you select the DB connection later using this name during the module configuration.
The connection name is displayed in the table with the DB connections in the DB name column.
You can edit DB connections at any time once they have been created by selecting the respective connection in the table and clicking on the <Edit> button.
Use the <Remove> button to delete the selected DB connection.
Note |
|
|---|---|
 |
If a database connection is to be deleted that is already assigned to one or more modules, a warning appears. Because SQL modules are linked to a DB connection in the SQL interface, you must make sure that the modules do not lose their reference to the connection. Otherwise the SQL statements will have no effect. |