Proceed as follows to generate a new certificate.
-
Click the
 button.
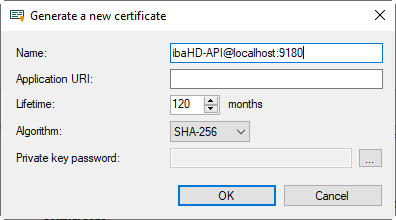
The following dialog opens.
-
Enter a name of your choice for the certificate or use the default name.
-
If required, enter an Application URI.
The URI (Uniform Resource Identifier) is a global unique identifier for the application. If you do not fill in this field, a standard URI will be generated, provided, that the OPC UA client verifies an Application URI which is made up of the machine name and application name:
urn:machinename:applicationName -
Define the desired validity period (lifetime) for your certificate.
-
Select the desired hash algorithm for the encryption.
You have the choice between the algorithms SHA-256, SHA-384 and SHA-512. Make sure that the other communication partners support the selected algorithm too.
-
Define a password for the private key.
If no password has been entered, the <OK> button remains inactive. To assign the password, click the <...> button and enter the password twice and confirm with <OK>. There are no special requirements for the password. Keep the password in a safe place so that the self-generated certificate can be exported and used for Windows or other applications.
-
Exit the dialog with <OK>.

You can now use the certificate you have just created as an API communication certificate.