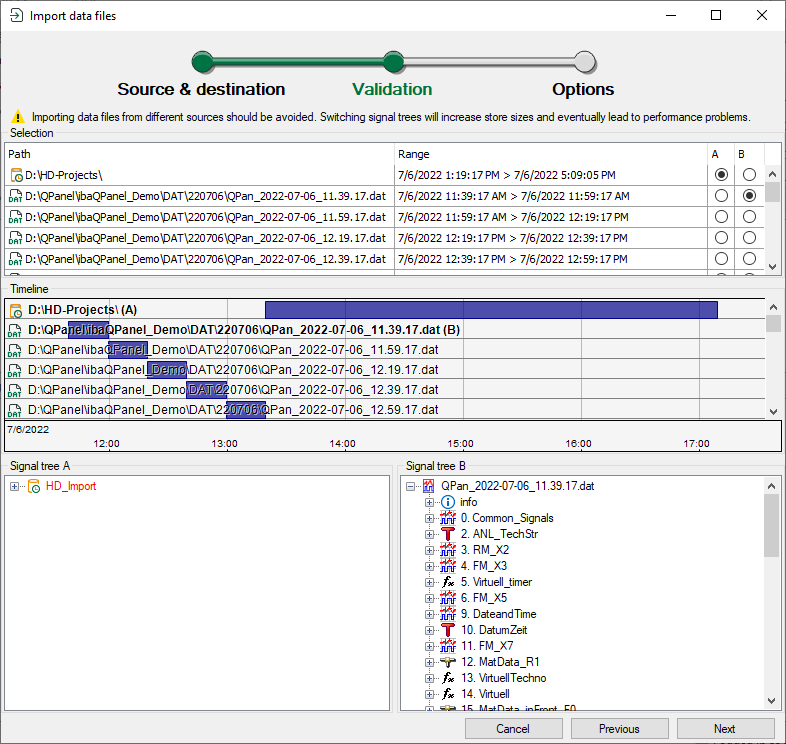
During validation, the upper part of the dialog shows a table with the destination store and the data files selected in the previous step, see Data file import – Set source & destination.
Below, the databases in the destination store and in the backups are displayed as bars along a timeline. If you position the cursor in the timeline area, you can zoom with the mouse wheel. You can move the time axis with the cursor on the time scale by holding down the mouse button.
There are two signal tree windows A and B in the lower area. You decide which signal tree is displayed using the option fields in columns A and B of the table above. This allows you to compare the signal trees and check, for example, whether the data file and destination store match. Differences between the signal trees are highlighted with red font.
Example: Import multiple data files into a still empty HD store
To continue with the import, click on <Next>.