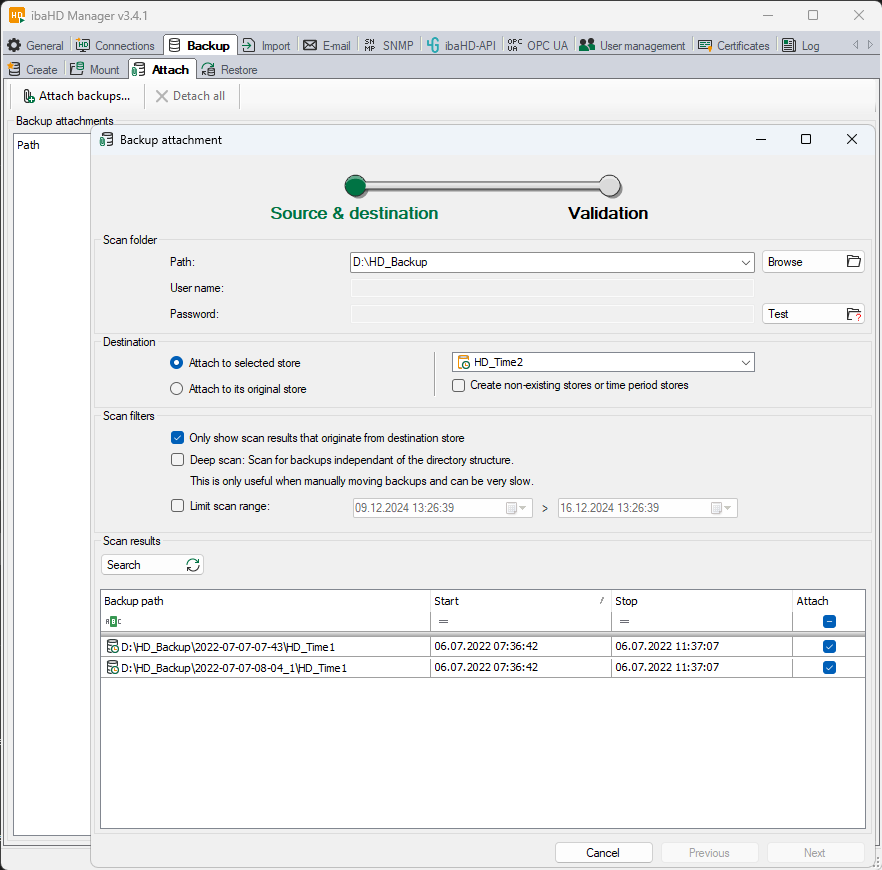
In the ibaHD Manager, select the Backup tab – follow-up tab Attach – button <Attach backups...>.
Make the necessary settings in the Backup attachment dialog.
Path, user name, password
Specify the path where the backup to be appended is located or select it using the browser. If necessary (network drive), specify a user name and password.
Use the <Test> button to check whether the file path is reachable.
Destination
Select to which store(s) the backup is to be attached. The destination store can also be a mounted backup.
-
Attach to selected store
With this selection, you can specifically select an existing store in the field to the right.
-
Attach to its original stores
This option is preferred if several stores are contained in one backup. The information about the original store is included in every backup. If the folders contained in the backup do not exist on the HD server, you can activate the option Create non-existing stores or time period stores to ensure that they are created automatically during the attachment process.
Search results and search filter
Click the <Search> button to start the search for available backups.
In the "Scan results” table, the backups are listed that exist in the set file path and that correspond to the criteria set under the scan filter.
If you have selected a certain store under the destination, then you can disable the option Only show scan that originate from destination store. This option is enabled by default in order to list the backups matching the target.
If you have selected the attaching to the original stores under the destination, then this option is also enabled.
If many backups are contained in the source directory, the restriction of the time period in the overview helps.
If backups in the search results are not to be appended, remove the check mark in the column Attach.
Click on the <Next> button to go to the next step.
