After the initial installation, there is only one administrator user, called admin, who has all rights. He is not subject to any restrictions and can set up, remove or change the rights of other users. The name admin cannot be changed. All users or domain users added later can be assigned the same rights as the administrator user.
-
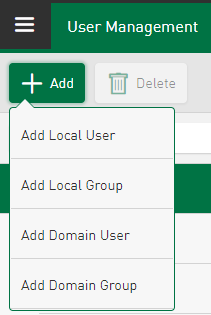
To add a new user, tap <Add> in the user management.
-
Tap on <Add Local User> or <Add Domain User>.
-
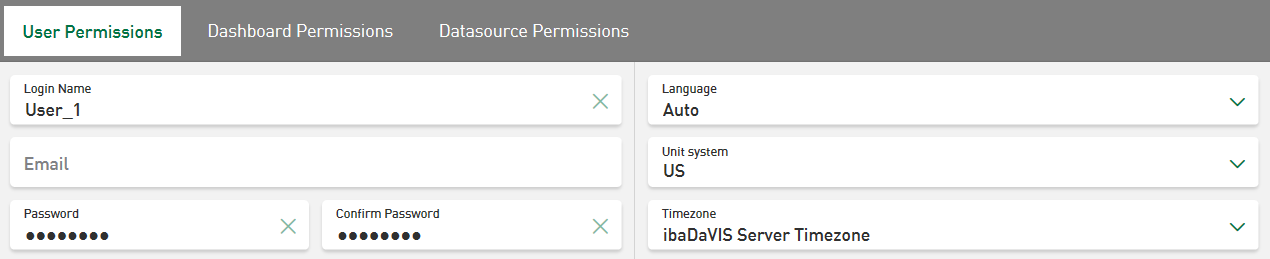
If it is a local user, enter the name and password and optionally an e-mail address.
Note

The name of the user may only consist of letters and numbers. Spaces and special characters are not supported.
Note
The password must be at least 6 characters long. It must be case-sensitive and contain numbers and special characters.
-
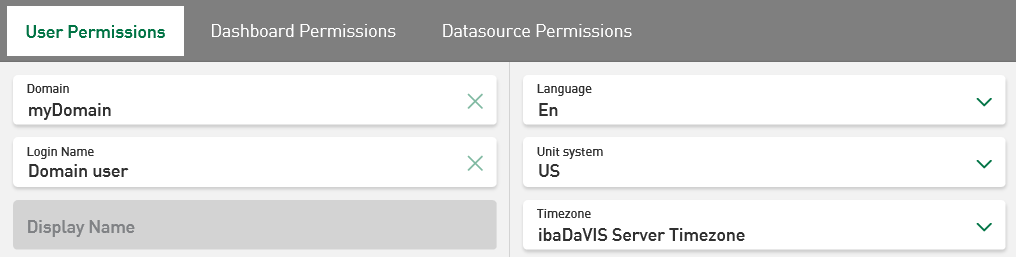
If the user is a domain user, enter the full name of the domain and the user name.
Note
The domain user name must not be identical to the local user name, otherwise the domain user cannot be saved.
-
Make optional settings for the Language, the Unit system and the Timezone.
These settings can later be changed individually via the User Profile, see User Profile.
-
Define the user permissions, see here:
-
Confirm the settings with <Save>.


