Create as many dashboards as you like in the dashboard overview, organize the dashboards in folders and add custom images.
-
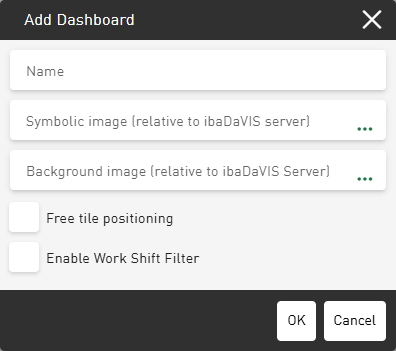
In the dashboard overview tap on <Add> – <Add Dashboard>.
The Add Dashboard dialog opens.
-
Enter a Name for the dashboard.
-
Optionally, enter the file path to a user-defined image in the field Symbolic image (relative to ibaDaVIS server) or tap … to select the image in the corresponding directory.
If the dashboard is inserted in a folder with a defined image, it automatically receives the image of the folder unless you select a different image for the dashboard.
You can insert schematic representations such as photos or pictograms in common image formats such as *.png, *.bmp, *.jpg, etc.
The image is displayed directly in the editing dialog in a preview.
-
Optionally, select an image in the field Background image (relative to ibaDaVIS server) that you want to appear as the background on the dashboard.
-
If you want to freely arrange and move the tiles on the dashboard, enable the Free tile positioning option.
When disabled, you can move and arrange the tiles using a predefined grid.
-
If necessary, activate the option Enable Work Shift Filter, see Setting a work shift filter.
-
Confirm the settings with <OK>.
The dialog is closed and the new dashboard appears in the dashboard overview. The new dashboard is arranged in alphabetical order.
-
If necessary, move the dashboard to the desired location in the dashboard tree using drag & drop.
