In this step you add the ibaCMC database to the report as a data source.
Before you can add the data source you should upload the report template for the report (see 3.5). Because the data source has not yet been created, it cannot be connected in the report. This step occurs later in section Upload and link the report from ibaCMC
After you have uploaded the report template you can can now add a new data source.
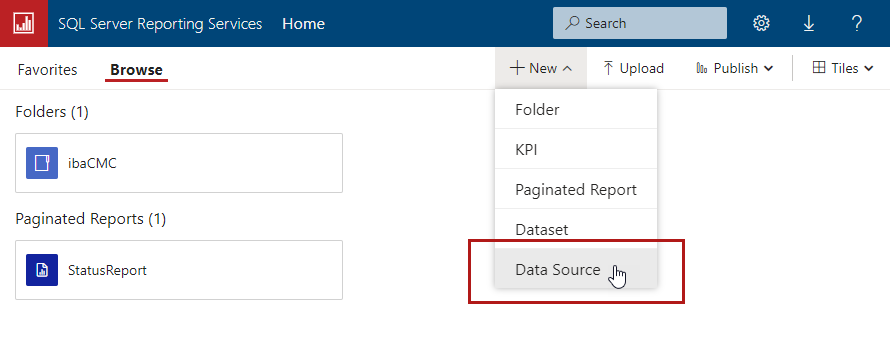
iba AG recommends creating the data source in the previously created folder for better clarity. Hence, open the folder first and the select +New – Data source in the menu.
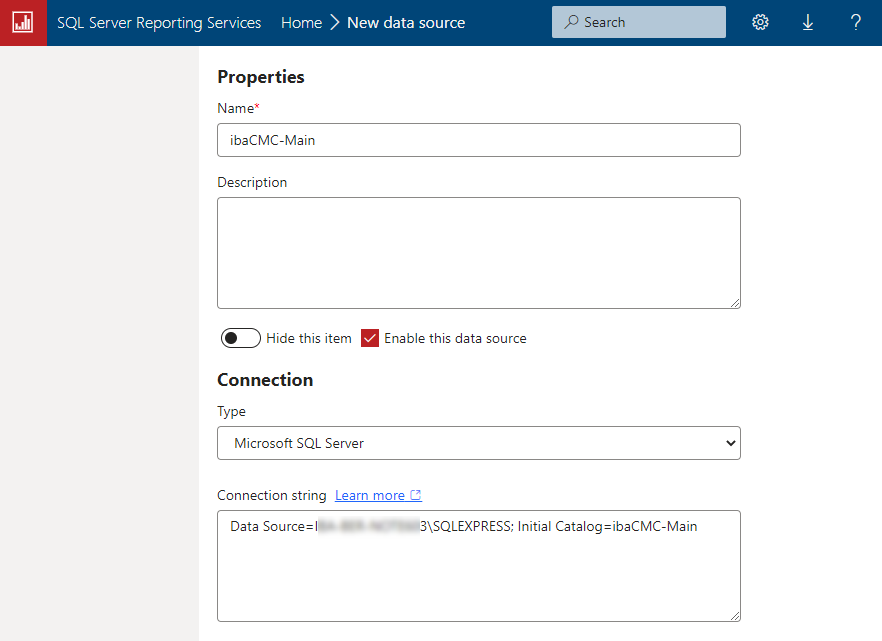
In the following dialog, enter the required information regarding properties, connection and credentials.
Name
This is the name of the data source. It is useful to choose the name of the database the reporting service is supposed to access (e. g. ibaCMCMain).
Description (optional)
Here, you can enter a description of the data source.
Enable data source
If not done yet, check this option to enable the data source.
Type
Select the type of the database server in use (e. g. Microsoft SQL Server)
Connection string
Enter the path of the data source here. Enter the path in the following form:
Data Source=Server name + Instance name of the SQL Server;
Add furthermore:
Initial Catalog=Name of the database
Example
If SQL Server and SQL Server Configuration Manager are installed on the same computer, the standard configuration would be as follows:
For SQL standard server Data Source= .\; Initial Catalog=ibaCMC-Main;
For SQL Express server Data Source= .\SQLEXPRESS; Initial Catalog=ibaCMC-Main;
Credentials
Select the desired login method here.
iba AG recommends using the login method Use the following credentials for ibaCMC.
Select Database user name and password in the field Type of credentials.
Then enter the previously in SQL Management Studio created username and password.
Note |
|
|---|---|
|
It is possible to use a Windows user but due to the complex structure of permissions it is not recommended. |
|
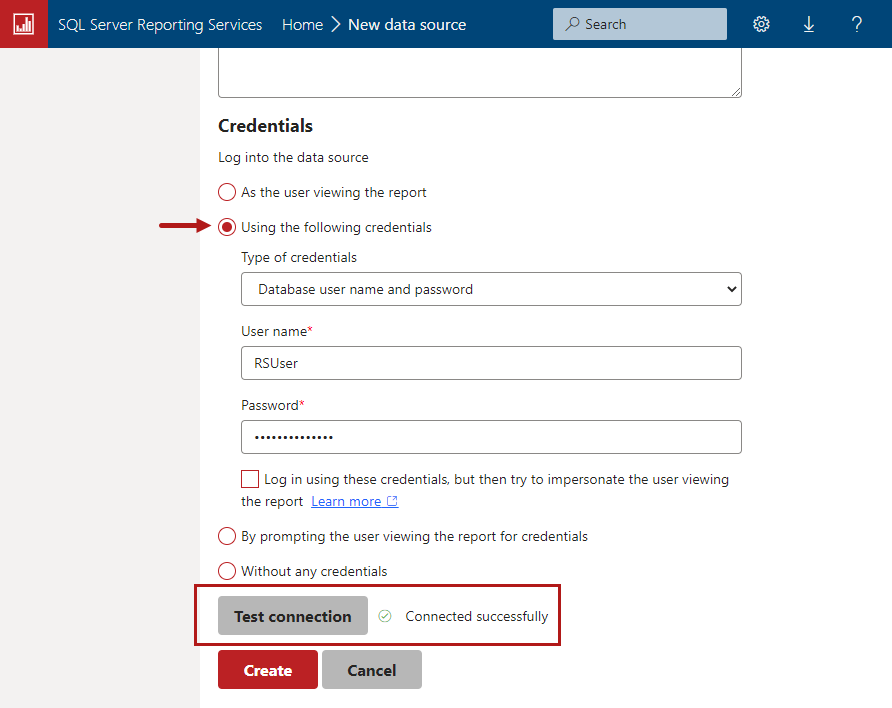
Test the connection to the source and save the settings
Click on <Test connection> to verify the connection to the data source (database server). A message next to the button indicates success or failure of the connection attempt.
Click on <Create> to save the settings.