The plant configuration is one of the central features and, in many cases, the starting point for all activities. It is opened by selecting Asset configuration in the menu.
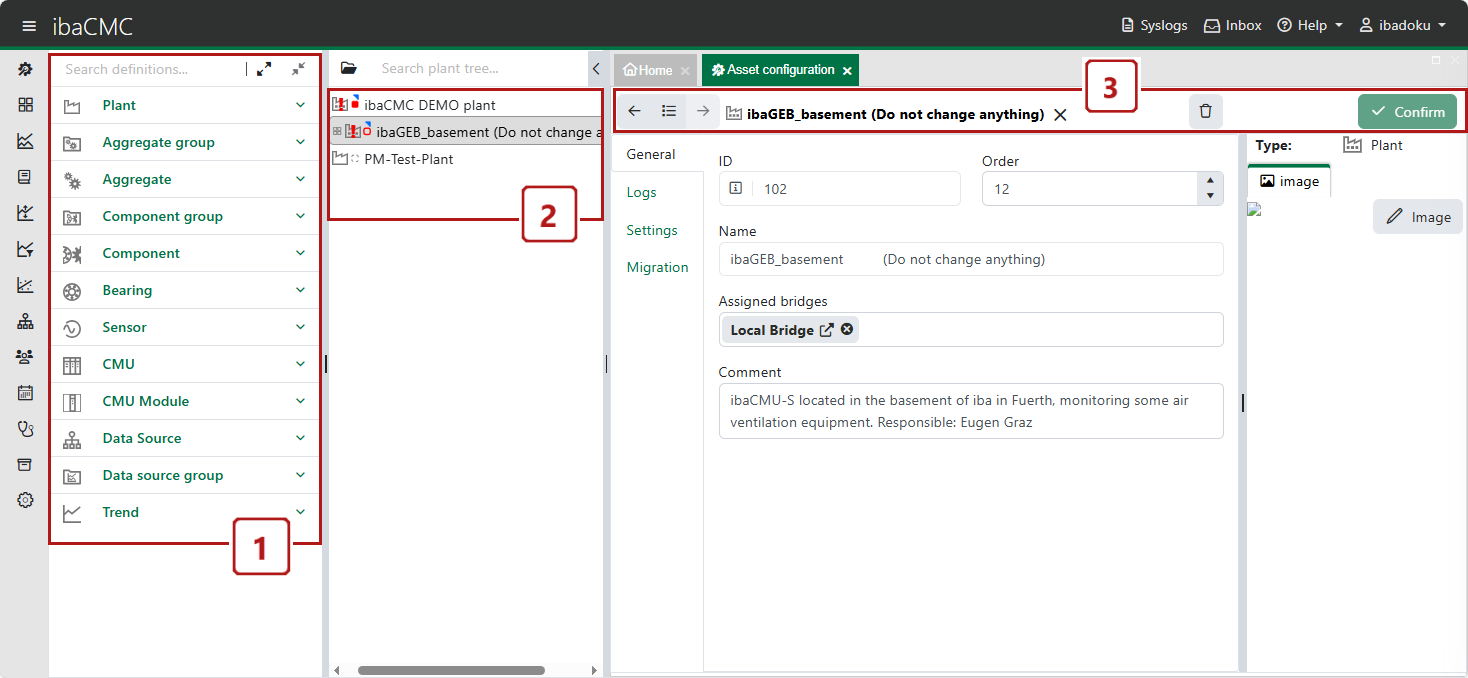
Once the Asset configuration tab has been opened, the plant tree is set to configuration mode, and the function of the component library (configuration definitions) is available.
You will find the component library in the upper field of the plant tree, indicated by the following icon:

Note |
|
|---|---|
|
If a user is logged in who does not have the right to carry out plant configuration due to their group memberships, the <Plant configurator> button is not displayed. |
|
The asset configuration is used to map the plant to be monitored, including its entire mechanical configuration through to the sensors. The plant configuration thus also provides the basis for monitoring of the individual components.
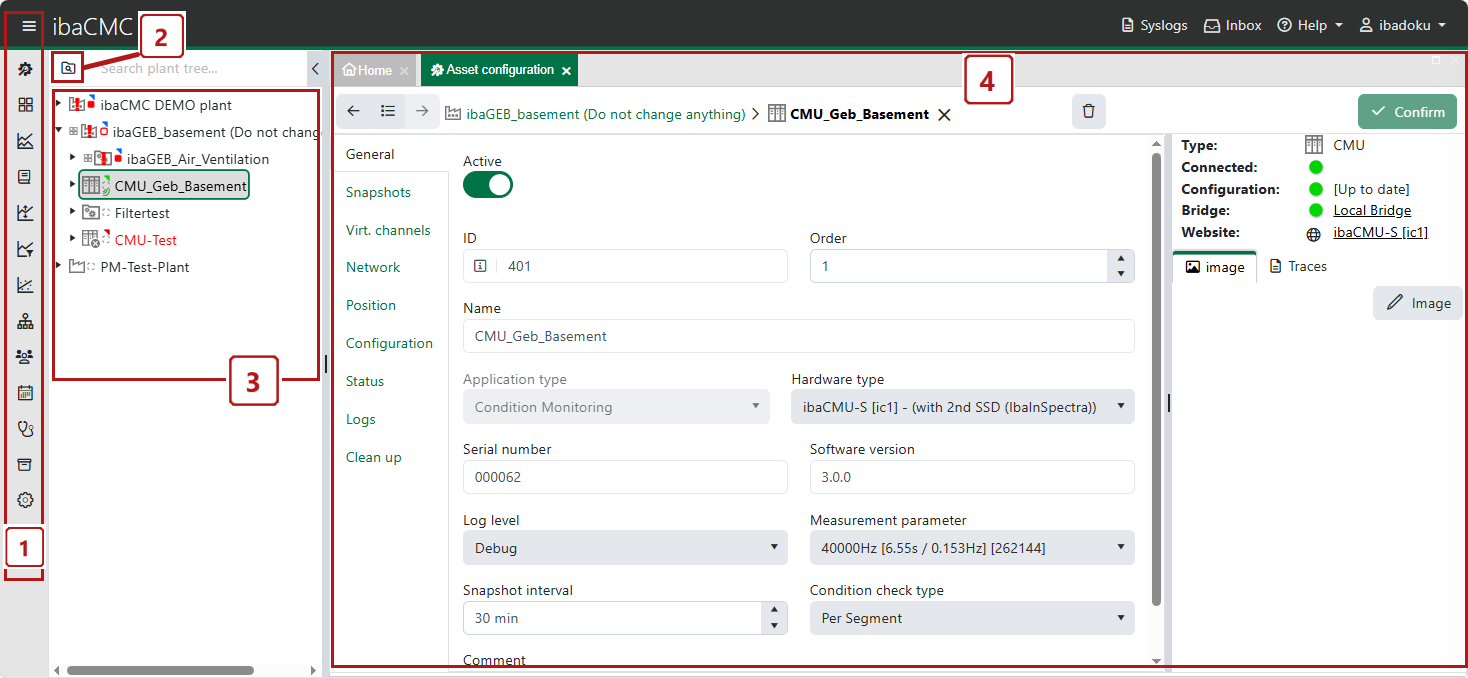
The asset configuration essentially consists of three sections - the plant tree, the detail editor, and the component library (configuration definitions), which can be shown or hidden using a button at the top of the plant tree. The following image shows the breakdown of functionalities.
If an item has been opened in the detail editor, a toolbar appears above the detail editor. This contains the path for the item, along with buttons that can be used to perform available operations.
The basic operations Apply and Delete can be performed for every item and are therefore displayed in the toolbar for every item.
All changes are only saved after clicking on the <Apply> button.
Defining the plant structure
You create the plant structure by dragging elements from the component library to the plant tree (drag & drop).
For initial configuration (blank plant tree), a plant can also be created using the “+ Plant” button on the Plant configuration tab.
Note:
To completely structure a plant, the following structure rules must be followed.
-
The root of a plant tree must always be a plant.
-
A plant requires at least one aggregate group.
-
An aggregate group contains at least one aggregate.
-
Aggregates contain at least one component group or one sensor.
-
Component groups contain at least one component (e.g. shaft).
Components from the component library can be dragged onto or next to an item in the plant tree. Whether this operation is compliant or valid is illustrated by the mouse symbol and the color marking of the target item.
The library also contains templates, which contain pre-defined sub-components to speed up the creation process.
Note: If a template such as an aggregate group, for example, is inserted (e.g. motor with three-stage gearbox), there may be a short waiting time as a large number of sub-components have to be loaded.
Plants can be deleted, but only if no CMU has been assigned yet. To enable the plant to be deleted, all CMU assignments must be removed first. To delete a plant, click on the <Delete> button (trash icon) in the top right corner of the detail editor.
Context menu in plant tree
The plant tree offers a context menu with the following commands:
|
|
Open dashboard |
Only available if the item is already assigned a dashboard. The corresponding dashboard opens. |
|
|
Refresh |
Refreshes the display of the item in the plant tree. |
|
|
Edit |
Loads the item into the asset configuration for editing or opens the asset configuration with this item. |
|
|
Delete |
Deletes the item in the plant tree, provided that all conditions for deletion are met and that no links to other components, sensors and CM devices exist anymore. |
|
|
Reset status |
Resets the status of a signal or trend. Does only work if the type of status change for the plant is set to manual reset. |
|
|
Copy name |
Copy the name of the item to the Windows clipboard. |
|
|
Copy path |
Copy the plant path of the item to the Windows clipboard. |
|
|
Id:... |
Shows the ID of the item. |

