By default, new reports have the "Base," "First Page," and "Following Pages" layers. You can edit these layers and add more.
Editing layers
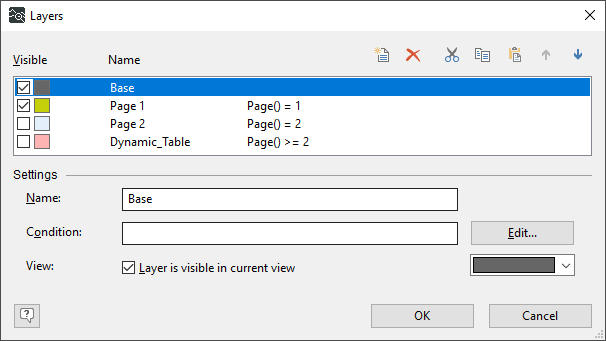
For this example, adjust the layers as follows.
-
Open the dialog for editing layers either by double-clicking a layer or via the Project – Layers menu.
-
Select the "Following Pages" layer and change the Condition to
Page()=2.If necessary, rename the respective layers to "Page 1" and "Page 2".
-
Create a new layer named "Dynamic_Table" and define the condition
Page()>=2.This layer is required for the dynamic table in the report, see Inserting dynamic tables. The "greater than or equal to" symbol (>=) is important to ensure that the table continues on the following pages if the data set is large enough.

Assigning objects to a layer
-
Check which objects are on which layer by selecting and deselecting the layers in the Report Designer.
-
If an object in the report is assigned to the wrong layer, open the context menu of the object and select the Assign Layer command.
In the dialog, select the desired layer and confirm using <OK>.
-
If you want to use the same object on two layers, copy the object to the other layer using the context menu command Copy to Layer.
In the dialog, select the desired layer and confirm using <OK>.
