You can use static tables to present different types of information in a structured way.
-
From the Insert menu, select the Table object.

-
Use the mouse to drag a rectangle in the workspace where you want to place the table.
The Table Contents dialog opens.
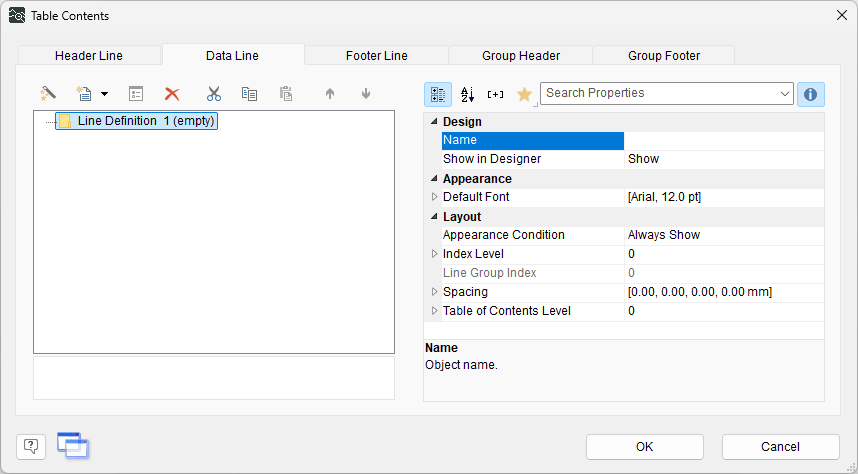
-
Add the desired number of rows using the context menu option Append New Table Line.
The number of columns depends on how many cells you define per row.
For this example, create 4 rows.
-
Use the Append a Column icon to define the contents of the cells in the table rows one by one.

The regular content editing dialog opens. You can use all existing variables. Enter text in quotation marks.
Alternatively, you can also use the wizard for data selection
 , to select all data for a row at once.
For this example, define the following columns. The first row has one column, and the remaining rows each have two columns.
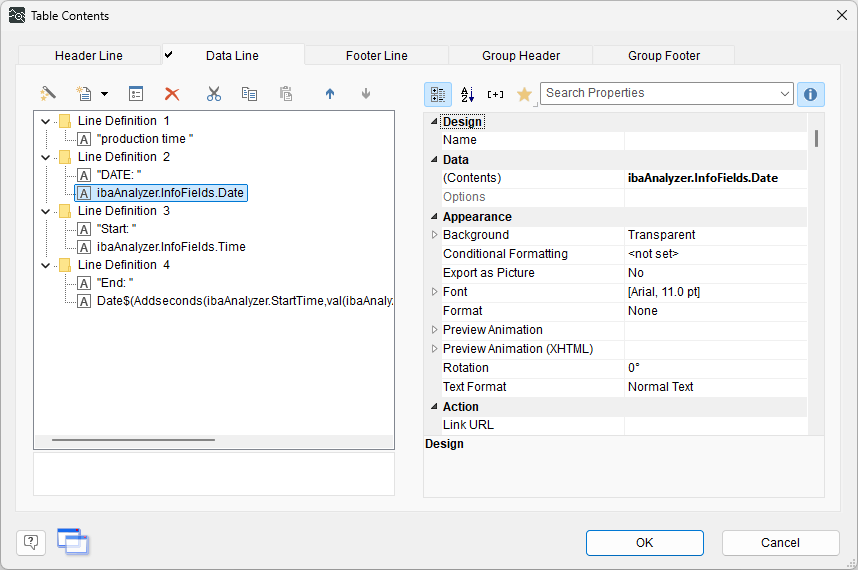
You can edit the content by double-clicking it to open the standard content editing dialog, or by using the properties on the right.
-
Format each cell using the properties on the right.
-
Confirm with <OK>.
-
In the Report Designer workspace, you can also further customize a selected table using the Table ribbon menu.


Tip |
|
|---|---|
 |
In the same way, you can also create headers and footers, or group headers and group footers. For more information, see Inserting dynamic tables. |