You can write trend queries in the same way as SQL queries, see SQL queries.
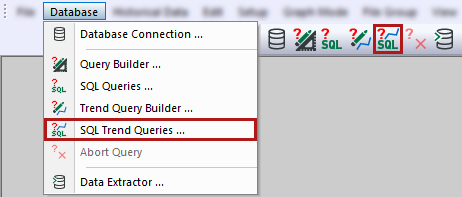
You can open the SQL trend query builder either via the Database – SQL trend queries menu or via the corresponding button in the toolbar.
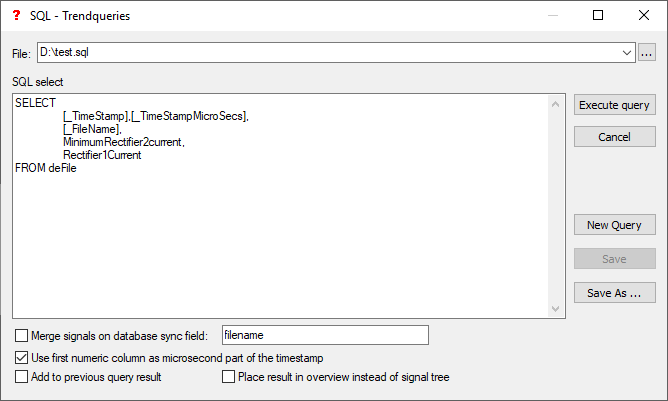
In the following window, you can configure SQL trend queries. Enter SQL statements to query the data from the database.
Place result in overview instead of signal tree
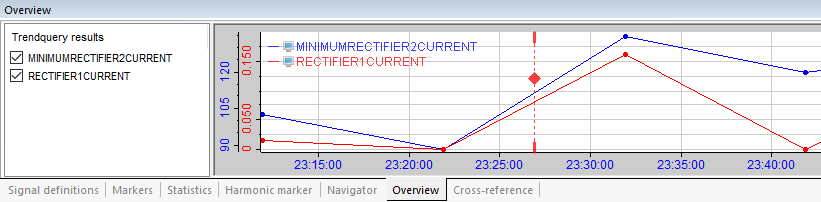
If you enable this option, the trend query results appear in the Overview window instead of in the signal tree.
Note |
|
|---|---|
 |
Note that the Add to previous query result option is grayed out when this option is enabled. This is because there can only be one query result (possibly from several signals) present at a time in the overview. Any trend query result already displayed in the overview will be replaced by the next query. |
<Execute query>
Each field in the set of results generates a signal with a name that is identical to the field name. The signal appears in the signal tree under the Trend query results node.
Use first numeric column as microsecond part of the time stamp
Note |
|
|---|---|
|
This column must contain the correct data type, otherwise the result will be meaningless. |
When executed, the statement must contain at least one numerical field and one set of results with a time stamp field. If there are several timestamp columns, only the first one is referenced, the others are displayed. The statement must also contain an ORDER BY clause for the time stamp field.
For more information on the following settings, see Query builder:
-
Merge signals on database sync field
-
Add to previous query result
-
<Cancel>
-
<New query>
For more information on the following settings, seeSQL queries:
-
File
-
SQL select
-
<Save>
-
<Save as>