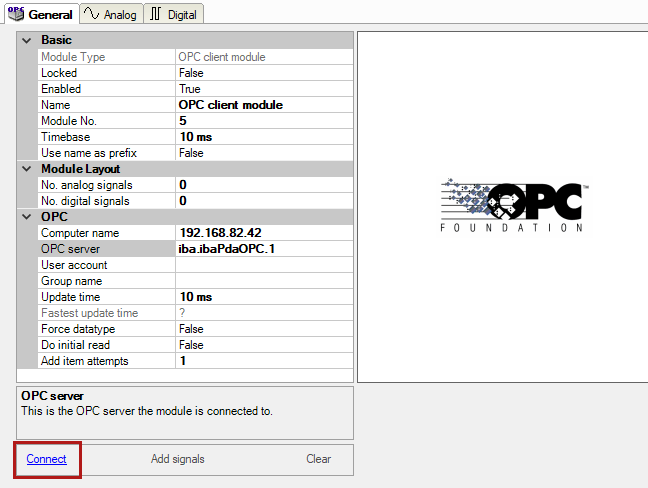
At the bottom of the General tab, you can find three hyperlinks:
"Connect", "Add signals" and "Clear".
As long as there are not entries in the signal tables, the hyperlinks "Add signals" and "Clear" are disabled.
In order to add OPC variables to the signal tables, follow these steps:
-
After you have made the settings for the OPC server in the General tab, click on "Connect".
-
If the settings are correct, the connection physically installed and the OPC server active, the "Add signals" hyperlink should become active shortly after. Click on the "Add signals" hyperlink.

-
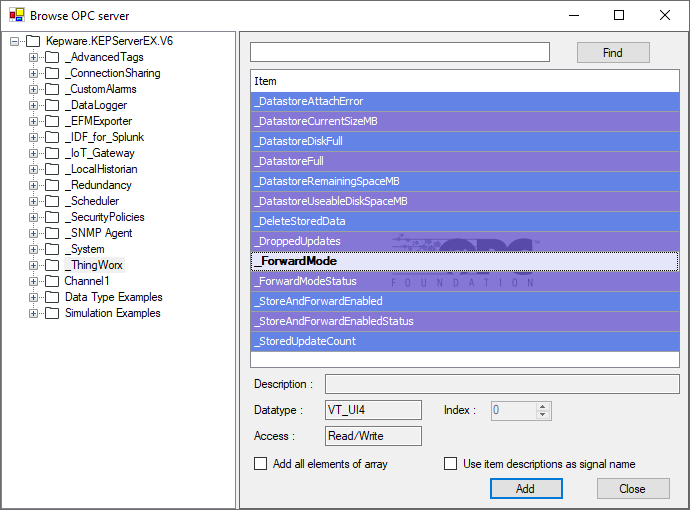
The OPC browser window opens showing all OPC variables of the corresponding OPC server. Select the OPC tags you want to be taken into the ibaPDA signal tables for measurement. You can select single or multiple signals (<Ctrl>+mouse click) or even complete sets (<Shift>+mouse click).
-
When you have selected the signals, click <Add>. The signals are automatically taken into the next free table rows. Analog and digital tags are recognized and separated automatically.
-
If all signals have been added to the signal tables, close the dialog with click on the <Close> button.
-
Disconnect the OPC server with the "Disconnect" hyperlink if you want to continue working in the I/O manager. If you want to leave the I/O Manager anyway, just click <OK> in the I/O Manager dialog. The OPC server is then disconnected automatically.