To add a profile for a Multidecoder module, click the blue Configure profiles link in the General tab at the bottom of the Multidecoder module.
Alternatively, you can open the drop down list on any decoder in the Profile column and click on <New profile> or <Edit profile>.
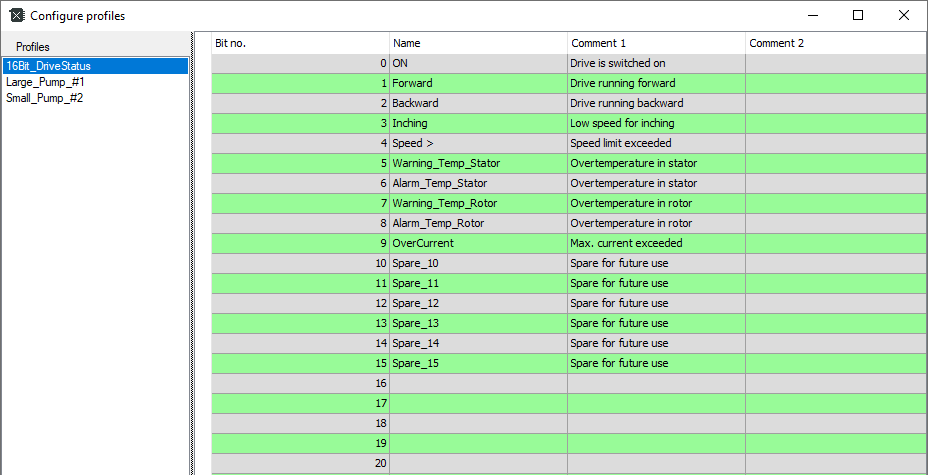
In both cases, the Configure profiles dialog opens.
Below the left window of the dialog you will find a set of buttons with the following functions:
|
|
Adding profile |
|
|
Copy selected profile |
|
|
Delete selected profile |
|
|
Import profile(s) from a *.multiDecoderProfile file |
|
|
Export selected profile to a *.multiDecoderProfile file |
Add a profile and rename it in a way that all relevant information for choosing a profile later is noticeable, e.g. number of bits and intended application.
Each profile consists of 32 bits. If a decoder assigned to a profile has less than 32 bits then only the used bits in profile are considered.
Now, enter a name for each bit in the table on the right side. Bits without a name will not be considered for decoding later.
These names will be the signal names of the digital signals. If needed, add some comments. The bit number in the first column is for information only and cannot be changed.
Example
Each of the main drives of a production plant provides an integer value, which encodes up to 16 status bits for transmitting the status of the drive. As there are many of these drives in the plant, a Multidecoder profile should be created, which can be assigned to any matching drive.
Name of the profile: 16Bit_DriveStatus
Application: Drive status with 16 bit

