The Module overview node offers an overview of the time base settings of the modules and their signals. Here, it’s easy to see the effect that changes of module timebases have on the output time and client update time. If you change the module timebases, the resulting values are accordingly updated here immediately.

System time values (only display)
-
Acquisition time base: Central acquisition time base, as it is set in the Register General, Settings node.
-
Interrupt cycle time: Interrupt cycle of the acquisition
-
Minimum output time: The fastest cycle in which signals that are configured as outputs can be updated and output. The shortest achievable cycle time of the outputs equals the smallest common multiple of all module time bases, but is at least 50 ms.
-
Client update time: Cycle in which the appearance of the live data is updated on the connected clients. This value too, depends on the smallest common multiple of all module time bases. The minimum here is 200 ms.
Table settings
Hide disabled modules
If this option is enabled, modules which have been disabled in their module settings will not be shown in the table.
Hide modules with set time base
Some virtual modules, e.g. 16 and 32-bit decoders, are permanently bound to the central acquisition time base. If this option is enabled, the affected modules will not be shown in the table.
Direction
Choose which modules should be shown in the table: Inputs or Outputs.
Interface
If you want to show only modules of a certain interface, then you can select the interface here. Multiselection is not possible.
You can setup more filters in the columns.
Table contents
All configured modules are listed in the table. Make a double-click on a module to get to the settings of the respective module. There you may change the module settings.
In the column Timebase you can change the value right away. You’ll see the effects of the change directly on the right side. Additionally, you’ll get a note if a change of the output time is the consequence.
The Active signals column shows how many analog and digital signals of the respective module are active.
The Configured signals column shows how many analog and digital signals are configured in the respective module. Configured signals may also be inactive. Inactive signals do not account for the total number of used and licensed signals (bar graph on the bottom of the I/O Manager).
The Samples/s column is hidden by default. You can show the column by opening the context menu of the table header and selecting Column/Band Chooser. The values in this column show the number of samples per second acquired by each module. The values result from the number of active signals of a module divided by the timebase, given in seconds.
Customize table layout
You can adjust the layout of the table according to your needs by showing or hiding columns or column groups ("bands"). The colum headers have two lines, where the upper line represents the bands and the lower line represents the columns.

To customize the table layout follow these steps:
-
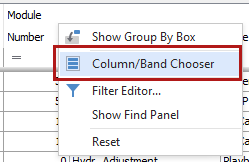
Open the context menu on the band or column headers. The context menus differ but both have the Column/Band Chooser command.
-
Select Column/Band Chooser.
The Customization dialog opens.
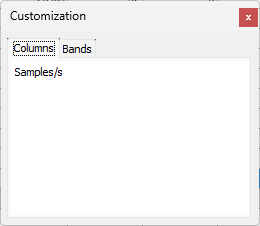
The Columns and Bands tabs contain the columns and bands which are currently hidden.
-
To show the column or band again just doubleclick on their name.
-
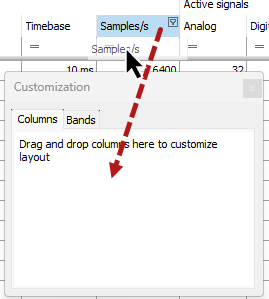
In order to hide columns or bands from the table, drag the column or band in question into the customization window.


Filter the table
You may filter the table entries in different ways:
-
Via the filter row: Select a search option via the <ABC> button or <=>. Then enter the search string or a value.
-
Via the hidden filter button in the header. The button appears when moving the mouse over the respective column header. Open the filter window with the filter button. Similar to Microsoft Excel you can now filter the entries in this column.
-
Via the search row: Via a right-click in the header you can open the search row by choosing <Show find panel> in the context menu. Enter here the search string or value. The entire table will be browsed for your search string or value and filtered.
For detailed information about the filter functions, please refer to Advanced filter in tables.