If no certificates are available to load, it is necessary to generate one.
-
Click the button
 and the following dialog box will open:
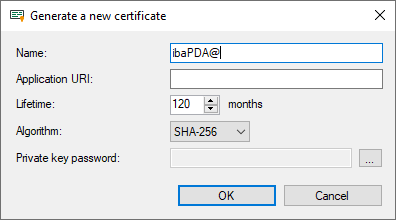
-
Enter a name of your choice for the certificate.
-
If required, enter an Application URI. The URI (Uniform Resource Identifier) is a global unique identifier for the application. If you do not fill in this field, a standard URI will be generated, provided that the OPC UA client verifies an Application URI. This standard URI consists of the machine name and the name of the application:
urn:machinename:applicationName. -
Define the desired validity period (lifetime) of the certificate.
-
Select the desired hash algorithm for the encryption. You have the choice between the algorithms SHA-256, SHA-384 and SHA-512. Make sure that the other communication partners support the selected algorithm too.
-
Define a password for the private key. If no password has been entered, the <OK> button remains inactive. To assign the password, click the <...> button and enter the password twice and confirm with <OK>. There are no special requirements for the password. Keep the password in a safe place so that the self-generated certificate can be exported and used for Windows or other applications.
-
Close the dialog with <OK>.
The new certificate is now entered into the list held by the certificate store and immediately assigned the properties "trusted" + private key.
You can now also export the certificate and register it with the communication partner, e.g., an OPC UA client. Afterwards, the client can then connect to ibaPDA (OPC UA-Server).