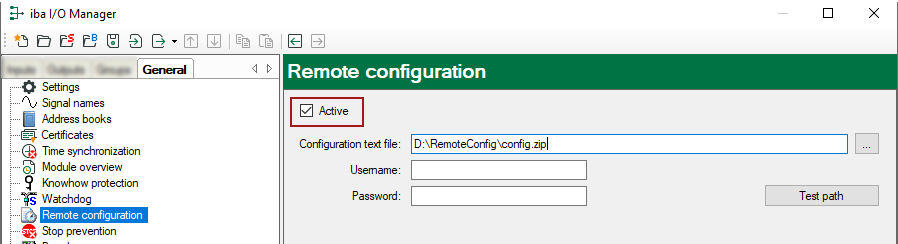
The remote configuration needs to be configured and activated.
-
Open the I/O Manager and select the Remote configuration node under General register.
-
Enable the function by checking the Active selection box.
-
Enter the full path and name of the configuration file you wish to use. The file name specified here including the file extension must exactly match the file name you will copy later into this directory. It may be useful to choose a file name which will be reused every time you want to change the configuration, such as "config". In that case you are not urged to change the filename in the I/O manager every time. On the other hand, the configuration name in the caption of the ibaPDA client window would always be the same.
-
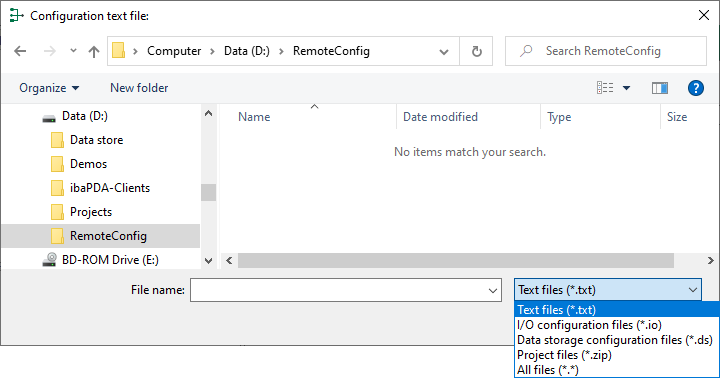
You can type in the information manually or you can use a browser which makes it easier if the path is very long or on a network share.
-
Via the button <Test path> you can check the accessibility of the directory, particularly if it is a network share.
-
Click on <OK> to close the I/O Manager. If the real configuration file is already stored in the specified directory, ibaPDA will immediately take the file, process and delete it.
Tip |
|
|---|---|
|
Setting up the remote configuration is part of the I/O configuration. To make sure that the remote configuration works again after it was executed, the remote configuration feature must be enabled and properly setup in every configuration file which is loaded via remote configuration. |
|
Attention! |
|
|---|---|
|
As the system reacts immediately when a proper configuration file was copied to the specified directory, you should take care that all settings or changes made are correct. Otherwise, the system might have a wrong configuration which leads to incorrect data files, displays or even prevent the system from restarting. |
|