Rules for access permissions can not only be enabled for individual licenses via the network, but can also be specified for entire containers.
If a system is to be used as a license server for multiple systems, multiple containers can also be set up on the license server and enabled for access by individual license clients. This option is also available for soft licenses.
Setting up multiple soft licenses on a system
The default activation mechanism only allows setting up one soft license on each system. To create multiple soft licenses on a system, you require a license template, see chapter Setting up a soft license file-based (offline)
Once downloaded, a license template can also be imported into the CodeMeter Control Center multiple times. Each import creates a new soft license.
Sharing licenses with multiple systems
If a system is to be used as a license server for multiple systems (license clients), a separate container should be set up for each license client in the CodeMeter Control Center on the license server. It is irrelevant whether the individual containers are USB dongles or soft licenses.
Using the permissions in “Advanced” mode, each available container on the license server can be configured for access by a license client.
-
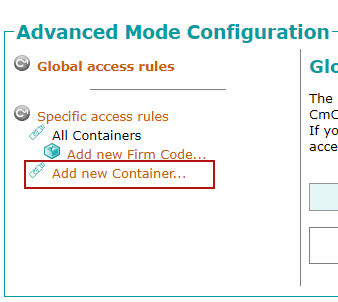
To do this, click on "Add new Container..." under Advanced Mode Configuration.
-
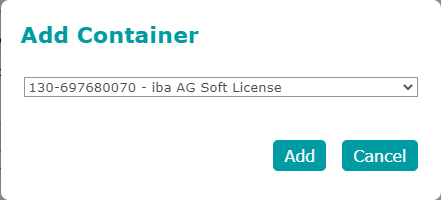
Select the relevant container in the selection list.
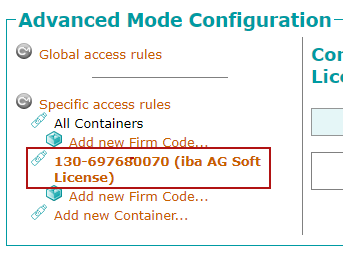
The entry is now visible under “Specific access rules”.


Setting up container specific license sharing
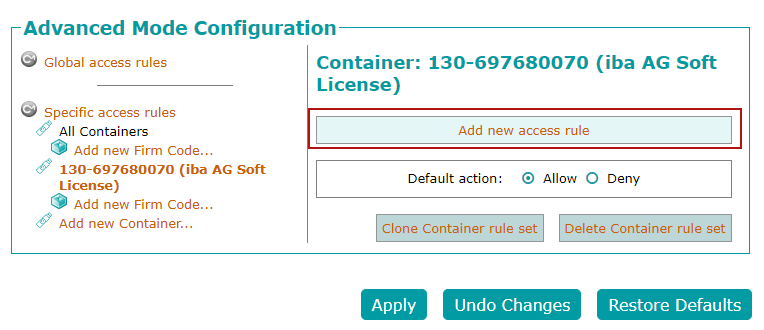
To specify which license client can access the licenses in the container added, select the relevant container in the list and define the corresponding default action. See also Enabling individual licenses for multiple clients.
If you select the “Deny” option as the default action, no client can initially access the selected container and the access permissions are only defined later in the process.
-
To do this, click on “Add new access rule” under Advanced Mode Configuration.
-
In the subsequent dialog box, enable “Allow” as the action to selectively allow access for defined clients based on the rules.
If you select the “Allow” option as the default action, you initially allow all clients access to the licenses so that specific clients can be selectively excluded later in the process.
-
To do this, click on “Add new access rule” under Advanced Mode Configuration.
-
In the subsequent dialog box, enable “Deny” as the action to explicitly revoke access based on the rules.
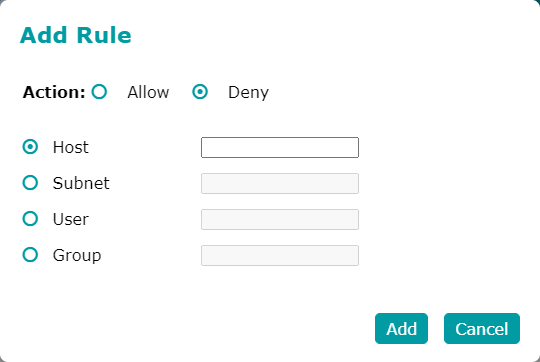


The following parameters can be defined:
Action
Allow: Access to the license is allowed
Deny: Access to the license is denied
Host
Host name or IP address of the system to which the rule relates
Subnet
The permission can be assigned not just to an individual system but also to an entire subnet (e.g. In the format 192.168.123.0/24).
User
If the users are logged into the systems via Active Directory, the permission can be linked to the user account.
Group
If the users are logged into the systems via Active Directory, the permission can be linked to the user groups.
Note |
|
|---|---|
 |
The <Refresh> button enables all known Active Directory users and groups to be retrieved. They are then available in a drop-down list. |
After completing the configuration settings, click <Apply> to save all changes.